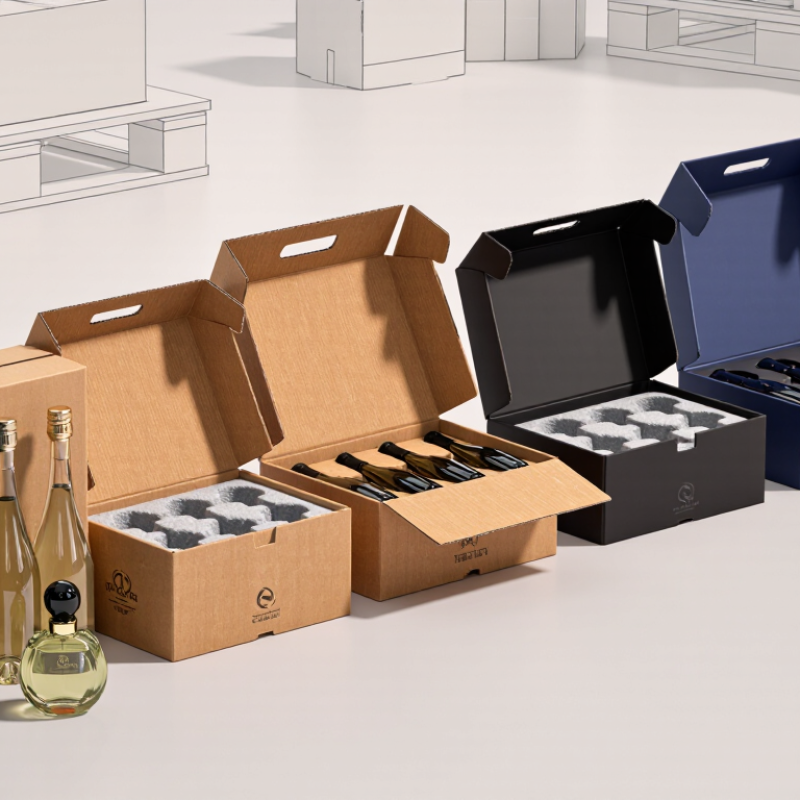
10 Tips for Choosing the Right Bottle Boxes?

Choosing the Right Bottle Boxes: A Practical Introduction

Selecting bottle boxes is more than choosing attractive packaging. The box must protect glass, support branding, control costs, and fit shipping conditions. A loose bottle can rattle during transit. A tight insert can create pressure marks. Small details matter.

Smithers’ The Future of Global Packaging to 2028 reports that the worldwide packaging market is expected to exceed $1 trillion during the forecast period. Its findings also highlight growing demand for recyclable materials and efficient designs. Meanwhile, the International Safe Transit Association stresses that packaging should be tested against vibration, drops, compression, and climate changes. These findings make box selection a technical decision, not merely a visual one.

Packaging expert Walter Soroka describes packaging as “the science, art and technology of enclosing and protecting products.” That principle applies directly to bottle boxes. The right choice depends on bottle shape, weight, closure type, stacking needs, and sales channel. Corrugated cartons may suit e-commerce shipments. Rigid boxes can create a stronger premium experience. Molded pulp inserts may reduce plastic use, but they can require careful moisture testing.

There is no perfect box.

This guide presents ten practical tips for comparing materials, inserts, dimensions, printing, protection, sustainability, and total cost. Some choices will still involve compromise. A beautiful box may ship poorly. A low-cost option may weaken brand perception. Testing real samples, with real bottles, remains the most reliable step. Even experienced buyers sometimes overlook that simple point.

10 Tips for Choosing the Right Bottle Boxes?

Identify the Bottle’s Size, Shape, and Protection Requirements

Choosing the right bottle box begins with accurate measurements, not attractive artwork. Measure the bottle’s height, widest diameter, neck length, and closure height. Include the cap, pump, or seal. A few millimeters can change the fit.

Measure twice.

A bottle with shoulders needs more room than a straight cylinder. Square bottles may require corner clearance to prevent pressure points. For glass containers, use an inner insert made from molded pulp, foam, or folded board. The insert should hold the bottle firmly without squeezing it. Shake the packed sample gently. Movement usually signals trouble. Drop-test a sample from a practical shipping height, then inspect the glass, seams, and closure.

Protection depends on more than thickness. A heavy bottle needs a stronger board grade and reinforced edges. A tall, narrow bottle may need a deeper locking structure to prevent tipping. For humid storage, choose materials that resist moisture and maintain their shape. I once approved a box that looked secure but allowed the bottle to slide during transport. The design passed a visual check and failed a handling test. That mistake reinforced a useful lesson: test the complete package, not the empty box.

Check how easily the bottle enters and exits. Tight packaging can protect well but frustrate customers and staff. Leave enough space for labels, decorative surfaces, and minor production variation. Small imperfections matter. A prototype made with the final bottle and closure gives more reliable results than a computer drawing alone.
Select Materials for Strength, Weight, and Sustainability

10 Tips for Choosing the Right Bottle Boxes?

Select Materials for Strength, Weight, and Sustainability

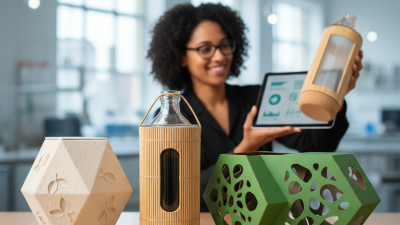
Material selection should begin with the bottle, not the box. Glass bottles need strong compression resistance and protective dividers. Lighter containers may need less board, but careless reductions can increase breakage. I usually test a packed sample with drop, vibration, and stacking checks. Real handling reveals weaknesses that specifications can miss.

Corrugated fiberboard suits many bottle shipments because its fluting absorbs impact while keeping weight moderate. Check edge crush strength, moisture resistance, and adhesive performance. Avoid oversized boxes, which waste material and allow bottles to move. However, I sometimes over-specify board for safety. That is expensive, and it may increase transport emissions unnecessarily. A smaller, well-fitted box can perform better.

Sustainability also depends on what happens after delivery. Eurostat reported an 81.5% recycling rate for paper and cardboard packaging in the European Union in 2022. Yet coatings, plastic laminations, and difficult adhesives can reduce practical recyclability. Select fiber-based materials with clearly documented recycled content and compatible inks. Recycled aluminum can be useful for certain protective components. The International Aluminium Institute reports that recycling aluminum uses about 95% less energy than producing primary aluminum. Weight matters too. A lighter package lowers shipping demand, but only when it still protects the bottle. Design teams should request supplier test data, review certification scope, and repeat testing after humidity exposure. Numbers help, but field evidence matters more.

Match the Box Design to Shipping, Storage, and Retail Needs

1

Tip 1: Start with the shipping journey, not the artwork. A bottle box may face vibration, stacking, moisture, and sudden drops. Choose strong board with tested inserts that keep the bottle centered. I once underestimated warehouse stacking pressure. The box looked excellent but weakened at the corners. That mistake changed my testing process.

2

Tip 2: Match the structure to storage conditions. Compact boxes save shelf space, while wider designs improve stability during handling. Measure filled bottles, caps, labels, and protective padding before selecting dimensions. Leave enough room, but avoid excessive movement. A simple shake test can reveal loose fittings quickly. It is surprisingly useful.

3

Tip 3: Retail presentation matters after protection is confirmed. Clear product information, clean opening features, and a balanced shape can improve shelf appeal. Consider how staff will unpack and restock each carton. A beautiful box that tears during opening creates waste and frustration. I would also review the design with warehouse workers, not only the sales team. Their practical feedback often exposes details that sketches miss. Test printed samples under store lighting, because colors may appear duller than expected. Good packaging should survive transport, fit storage systems, and look intentional.

Evaluate Inserts, Closures, Printing, and Customization Options

Choosing the Right Bottle Boxes: Evaluate Inserts, Closures, Printing, and Customization Options

A reliable bottle box begins with the insert. I have found that a snug insert prevents movement, scratches, and awkward shelf presentation. Measure the bottle at its widest points, including the cap and label. Fit matters. Paperboard, molded pulp, and foam each offer different protection levels. Molded pulp feels sturdy and can support a more natural presentation. Foam usually cushions better, but it may not match every packaging goal. Test it.

Closures also deserve practical attention. Magnetic closures feel refined, while tuck flaps can simplify packing and reduce components. Check whether the box stays closed during transport. A beautiful closure is useless if it opens inside a shipping carton. Printing should remain readable under store lighting. Compare color samples on the actual box material, not only on a screen. Small text can disappear after folding. This is easy to miss.

Customization should serve the bottle, not overwhelm it. Consider window placement, embossing, foil details, internal messages, and custom dimensions. A window can display the product, but it may reduce structural strength. More decoration also increases production variables and possible defects. Request a physical prototype before approving a large order. Inspect the edges, insert alignment, closure tension, and printed colors. My earlier choices have sometimes favored appearance over packing speed. That mistake taught me to test the full packing process, not just the finished box.

10 Tips for Choosing the Right Bottle Boxes: Evaluate Inserts, Closures, Printing, and Customization Options

No. Selection Dimension What to Evaluate Recommended Option Practical Check
1 Bottle Dimensions Measure the bottle height, diameter or width, shoulder shape, neck, and cap clearance. Choose an internal fit that prevents excessive movement without compressing the bottle. Allow room for protective inserts and verify the assembled box closes without bulging.
2 Bottle Material and Fragility Glass bottles are more vulnerable to impact, while plastic bottles may need protection from crushing or deformation. Use stronger board grades and cushioning for glass or irregularly shaped containers. Conduct drop and vibration testing with the actual filled bottle.
3 Insert Design Consider fit, cushioning, assembly, recyclability, and whether the insert protects the neck and base. Use die-cut paperboard inserts for lightweight support or molded pulp for stronger cushioning. Check that the bottle remains centered after repeated handling.
4 Closure Style Evaluate opening convenience, tamper resistance, shipping security, and whether the box will be reused. Choose tuck flaps for efficient packing, magnetic closures for premium presentation, or locking tabs for added security. Open and close the package repeatedly to check wear and alignment.
5 Board Strength and Thickness Review paperboard caliper, stiffness, burst resistance, and the total weight of the packed bottle. Select the lightest board that passes compression, stacking, and transport tests. Test boxes at the intended storage height and shipping conditions.
6 Printing and Color Accuracy Assess legibility, image quality, color consistency, barcode clarity, and resistance to scuffing. Use offset or digital printing according to volume, artwork complexity, and proofing needs. Approve a physical proof and scan every barcode on the final printed surface.
7 Surface Finishing Compare protection, texture, appearance, cost, and recycling considerations for coatings and decorative effects. Use water-based coating for general protection; reserve foil, embossing, or spot effects for key areas. Rub-test printed panels and inspect whether finishes interfere with folding or recycling.
8 Customization and Structure Consider window cutouts, compartments, handles, inserts, special shapes, and assembly requirements. Customize only features that improve protection, usability, or product presentation. Confirm that custom features do not reduce structural strength or increase packing time excessively.
9 Sustainability and Disposal Check recycled content, fiber source, mixed-material components, coatings, and ease of separation. Prefer fiber-based packaging with removable non-paper parts and minimal unnecessary material. Verify local recycling guidance rather than relying only on general recyclability claims.
10 Cost, Lead Time, and Testing Compare tooling, minimum order quantity, setup charges, production time, freight volume, and sample approval. Select the design that meets protection and presentation targets at the lowest total delivered cost. Request a pre-production sample and calculate cost per packed bottle, not only cost per empty box.
Evaluation note: Final box selection should be based on physical samples tested with the actual bottle, closure, insert, and distribution conditions.

Compare Suppliers, Costs, Quality Testing, and Order Flexibility

10 Tips for Choosing the Right Bottle Boxes?

Compare Suppliers, Costs, Quality Testing, and Order Flexibility

Choosing the right bottle boxes requires more than comparing glossy samples. Ask each supplier for material specifications, production photos, and a recent test report. Check board thickness, flute type, edge crush strength, and moisture resistance. A box that survives a showroom may fail in a humid warehouse. Request three quotations with identical dimensions and print requirements. Compare unit price, tooling, setup, freight, storage, and rejected-piece charges. The cheapest quote is not always cheaper. Clarify whether prices change at different quantities. Small details matter. I once underestimated inner dividers, and the final shipping cost erased the apparent saving. That mistake was avoidable.

Before placing a large order, request a physical prototype. Test filled boxes with drop, compression, vibration, and stacking checks. Measure damage after each trial, not only appearance. For fragile bottles, inspect divider movement and neck protection closely. Ask who performs the tests, which equipment they use, and whether records are dated. Reliable suppliers answer clearly. Order flexibility deserves equal attention. Confirm minimum order quantity, sample fees, lead time, split shipments, and replacement policy. A supplier may accept customization but resist small repeat orders. Get that condition in writing. Leave room for reasonable revisions. My preference is a supplier that explains limitations honestly, even when its quote is not the lowest. That transparency usually protects quality better than a polished promise.

10 Tips for Choosing the Right Bottle Boxes

Recommended evaluation priorities for comparing suppliers, costs, quality testing, and order flexibility.

Use these percentage weights as a practical purchasing baseline. Request written quotations, material specifications, test reports, sample approvals, minimum order quantities, lead times, and replacement terms before placing an order.